Sunday, June 22, 2014

90th Birthday - ombre

JUNE 2014

This is the second of the 90th birthday cakes for Nana.

I really wanted to attempt something classic and so the idea of ombre came to mind.  There are a lot of ways to achieve this look but I liked the circles.  The colour was always going to be blue as it's Nana's favourite colour.

I began with a different brand of fondant - Fondtastic.   It was closer to the shade of blue I wanted so I thought I'd give it a try.  This one was blueberry flavoured.  I would have preferred vanilla but they didn't have any.  The blueberry smell was a bit overpowering while I was working with it and because I added white vanilla fondant to make the lighter blues, it didn't taste blueberry either.

Anyway, I set about cutting out a heap of circles.  I started with the standard fondant colour as my darkest shade and then added some white, etc etc.  I know I made too many circles, but I didn't want to run out as I might not have been able to match the colour.

I wasn't sure how to cover the base of the cake so I tried putting 1/2 circles on an angle and they actually had a great frill effect.  I used the next shade of blue for the lower 1 1/2 levels and then another 3 lighter shades of blue.  I was really happy with the effect.  I just didn't want it to look like fish scales.


I made bow pieces out of the darkest blue colour to add on top of the cake.  I bought diamente numbers to stick in the centre and added some curls too.

THEN I forgot to take a photo of the finished product!   So, this is the best I have of the bow.


 I initially thought I was going to have 'Happy Birthday' around the base but the cake didn't need it.

 The candles I bought were Wilton.  The were supposed to have blue flames which sounded quite cool, but they really only started out blue and then flickered between orange and blue.  I purchased them and the numbers from Creative Cooks.


90th Birthday - yoga and Crows

JUNE 2014

This cake was one of 2 I made to celebrate my Nana's 90th Birthday.  The purpose of this one was to visit her yoga group (she's been going for 20 odd years) so she could celebrate with her friends.

My idea was to have this cake as a fun cake and the other one for our family party more formal and classic.

First thing I did was to make my Nana figure in a yoga pose.  I think I remembered her wearing a purple 'leisure suit' to yoga at one stage so lilac gum paste seemed perfect.  I made her grey hair using a garlic press.

The cake had to be vanilla as she can't eat chocolate. I started with the idea of just a buttercream covered cake but it just didn't have enough pizzazz so I ended up adding a light green fondant to the board and the cake.  I still need to perfect covering a board.  I end up with joins on the side as I can't get strips long enough to go all the way around.  More practice required.


I wanted to add in Nana's love of the crows so a scarf seemed to be a good way.  I cut out strips using my Wilton ribbon cutter.  Was worried they'd start to dry out as I was completing all the colours and would be harder to get onto the cake, but it wasn't too bad.

The final product wasn't exactly what I imagined but it still looked alright.  The end of the scarf really helped to finish it off.

The yoga mat was imprinted using a kitchen gripper.

I added sparklers and text and just before I left I stuck a Crows badge on the cake with piping gel.  I could have had this made to be edible but I didn't have time so this was just a paper badge.

The ladies all loved the cake and most of all Nana got more than she ever expected.


Carter's Jungle Cake

MARCH 2014


The request for this cake was a jungle theme.  As I've done a similar theme before I wanted to make the cake quite different.  I also wanted to try and get my cakes to be more dynamic across the whole cake rather than plonking figures on top - problem is that it's easier for me to prepare and fit around other commitments that way.  I did a better job this time, but still a lot more learning to go.

I pre-prepared by animals.


I also pre-prepared 2 palm trees.  I thought I'd try a new method of getting the leaves onto the trunk.  This time I cut out the canopy of the tree from one piece of gumpaste and made a curved mould from aluminium foil.  It actually worked quite well but the canopies were more delicate and so I ended up breaking my bigger sized tree.  Would have been much better to have 2 trees on the cake....


The cake came together quite nicely.  I think it's the best cake covering I've done using buttercream as the base.

Once the animals and the tree were in place I added a big lake flowing into a waterfall down the side of the cake.  Leaves and trunks and rocks were added all around.

I really liked the idea of having Carter's name spelt out in little lakes.  I used the crushed cookie method of adding sand /dirt to the cake board.  I held it down by smearing piping gel onto the board first.


Finishing touches were a number 2 in the lake and brushing oil over the lake to make it look like real water.  It certainly has a good effect.


Trav's 30th - Hawaiian theme

JANUARY 2014


Always fun to do a hawaiian themed cake.  Both tiers are cake.  The biggest issue putting this one together was the heat.  I couldn't get the fondant to stop feeling sticky.  Even tried putting it into the bathroom being the coolest place in the house.

The first thing I did in preparation for this cake was to make the Travis figure.  The request was to put him on the cake in the outfit he'd be wearing on the night.  I had some suggestions and the client had some suggestions and I think the finished figure looked quite similar.


I was even kind enough to add in his muscles and abs :-)  The finishing touch was a cocktail in his hand relaxing on a towel.

I've got the hang of stacking cakes much more now.  This one was quite large (but not as big as the paris cake).


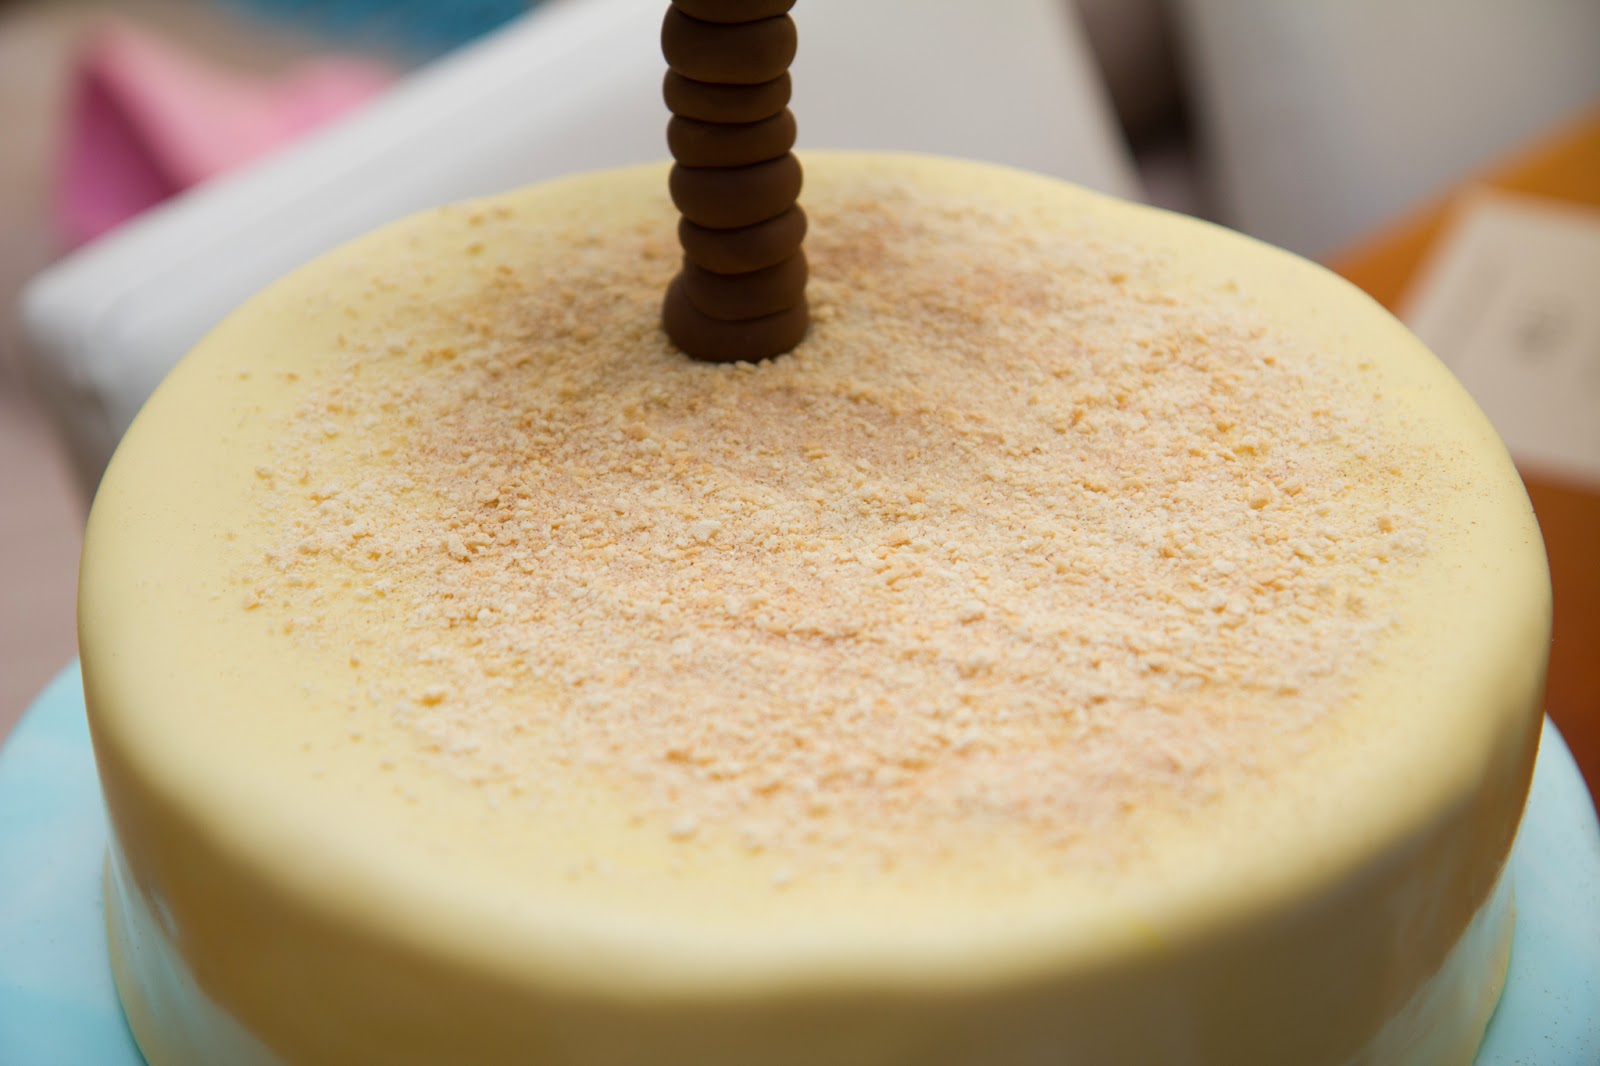
On the top tier I added some ground up biscuit with some cinnamon sugar dusted over the top to give the look of sand.  I was really happy with how this turned out. Previously I've used brown sugar but that's only been on the cake board.  I didn't think that would taste too nice on the cake so this was a much better solution.


Next step in assembly was to place Travis onto the cake next to his palm tree.  I made the palm tree the same way as previously but making individual leaves on wires and sticking them into the stacked trunk also onto a thicker wire.  Not loving this method but it is working.

I took the palm tree off until I was ready to deliver but really should have taken it separately as it did pull down on the cake a bit.  You live and learn.


From there I added some 'waves' to cover the cake joins.  I put some blue colouring down the sides of the piping bag so that the buttercream would have a streaked effect.  It looked quite good as waves coming to shore.


There were quite a few finer details added to this cake to complete the look.  I made the shells using gumpaste and a Wilton Sealife Mold.  The starfish was a mold from Caroline's Sugar Art - I found this one better than the one on the Wilton mold.  I brushed them with different coloured petal and lustre dust.

Previously I haven't had great success with silicone molds but I was told to spray them with cooking oil before hand - just a little - and they'll come out a lot easier.  It worked a treat.


Before putting on the sealife I added  more 'sand' all around the base of the cake.


Also added some turtles, made using gumpaste and turtle mold from Carolines Sugar Art and a family of fish.


 I struggled deciding on the colour of the lettering.  There were already quite a few colours on the cake and I didn't want it to look too out of place.  Happy with the orange in the end.

Used 3 different lettering systems to get the result.


Thursday, October 31, 2013

Baby Group First Birthday

OCTOBER 2013


I saw a cute idea somewhere for a group baby cake - just had to wait until they turned 1 to make it.  I was really happy with how this one turned out.  So cute!

I started ages ago making the baby figures.  The idea was to replicate a group photo we took when they were about 7 months old.  I tried to match the colours to what they were wearing and also the poses (as much as I could).  There was one baby missing from the photo so I had to add him into the line-up.

I started with the bodies.  After I'd made a few I realised I was adding their arms a different way to usual and it didn't look as good, but it was too late to change now.  Oh well, I'm sure the babies will forgive me. I also made up little name blocks for each child, but I didn't mix enough of some colours so the blocks weren't all the same size.  Rookie mistake :-(


All lined up and ready for heads.  (I had to tell the Mums not to read anything into the head and body sizes if they were slighting bigger or smaller - this was not intentional)

Adding the heads was great.  It really brought the babies to life.  I didn't go too fancy, just some white fondant tinted with skin tone colouring, a small ball for a nose, eyes added with edible marker and mouth indented using a piping tip.  There are 3 babies with ethnic backgrounds and I didn't want to offend anyone by making them all white so I added a small amount of chocolate fondant to these heads just to add a subtle difference.

Three of the babies had hats on in the photo so I replicated them as well.  Just love the hat with ears!

So the babies were nearly finished!  I added hair using a garlic press.  It's really hard to create a blonde effect and I didn't want to go yellow so I used a skin coloured fondant.  The curls coming out from under the cap are a favourite :-)

The cake itself needed to be long enough for all 9 babies so I baked 2 rectangle cakes in vanilla and chocolate.  (Caroline's Sugar Art hire tins for $5) I cut these down the middle to create 2 cakes with 2 tiers.  I used Greens moist vanilla and chocolate cake packet mixes which were delicious - will be using them again.  I filled them with the icing from the packets.

FYI - there aren't any cake boards big enough for this size. I used some cardboard offcuts to put under the cake itself and had my husband cut down some cupboard backing we had lying around from a previous IKEA purchase for the presentation board.  Bit rough on the edges but did the job.

The cake was covered in a light green buttercream and had a green fondant strip to replicate the grass.  I was meant to use a textured roller before putting it onto the cake but I forgot.  I used my Wilton ribbon cutter and it worked perfectly.  I might just be getting the hang of that thing!

I used a grass piping tip and darker green icing to edge all around the cake and where the photo was going to stick out like a banner.

Last thing to do was to create some lettering.  I used FMM tappits in Fancy and added some glitter,  positioned it all in place and wallah....done.

I handed over the babies to the respective parents on the day :-)


Sunday, October 20, 2013

Haylee's baby shower

OCTOBER 2013


There was no doubt that an owl theme was required for Haylee's baby shower.  It wasn't a huge gathering but I still wanted to do a cake for her.  In the end there was so much other food we didn't even cut it on the day, but I'm hoping the dad and mum-to-be enjoyed it on their own.

The cake itself was a chocolate cake with chocolate icing filling (the Better Homes & Garden one I've used before....yum)  The cake mix I used was a new Betty Crocker Indulgence one so I'll be interested to know how it tasted.

I made the gumpaste owls early on.  It was harder than I thought to work out how to get them looking good.  It seems you can go 'modern/contemporary owl' or 'traditional owl'.  I decided on the modern touch.


I covered the cake in buttercream and let it rest so it would form a crust but because it was so hot it didn't really happen.  Should have left it in the fridge overnight.  When I was smoothing down the fondant the buttercream was oozing out the bottom.

I tried my hand at frilling - still need a LOT more practice - and piped a border in purple.  I was going for a 2-toned effect but in the end just blended the white and purple together.  Also rolled out lengths of chocolate fondant to make a nest for the Mummy and baby owl to sit in.  This was topped with some small green fondant hearts.


I created some fondant buttons using a mould and added them to the top for a simple, clean look.


All in all I was happy with the result.


Zoe's First Birthday - ladybug cake

OCTOBER 2013


For Zoe's first birthday I didn't want to go too overboard - has to better each year right?  I found some themed items that I used as the basis for the decorations and the cake....


The top tier was once again a fake tier so I could make it earlier.  I covered a foam circle with light pink fondant and used skewers as support for the banner.  Spotty straws slotted straight over the skewers and were finished with some pink fondant.  The banner itself was gumpaste on wire which was pushed through the straws to stay in place.  This picture shown here is my first attempt which wasn't the right colour purple.  I made a couple more (as back up) in a lighter lilac tone.


The lettering is FMM brand in ''funky".

I tried using cereal treats for my sculpting of the ladybug body to save money on the fondant.  It was much easier than I thought and easy to cover in buttercream and fondant.


.

Up till now I could make things in advance, but once the top layer was finished I had to wait until it was party-time.  The final touches to the top layer were vertical stripes.  I used the perspex rulers instead of the Wilton ribbon cutter this time.  I actually think I prefer it this way, but maybe just need more practice with the roller.


The cake portion (bottom tier) was a 12inch chocolate mud cake filled with chocolate icing and covered in buttercream and white fondant.  I used pink spots to tie into the napkins. plates. etc.  On reflection the spots should have been larger.  Also, the fondant was thicker than usual as I'd hurt my back and couldn't roll it thin enough.

I also added some green leaves under the ladybug.  These were piped using buttercream using the Wilton leaf tip. 

I covered the board with white fondant this time and added some green buttercream stripes.  I thought adding green checkers (per the napkins) would be too overpowering for the cake.
This cake fed approx 70 people.